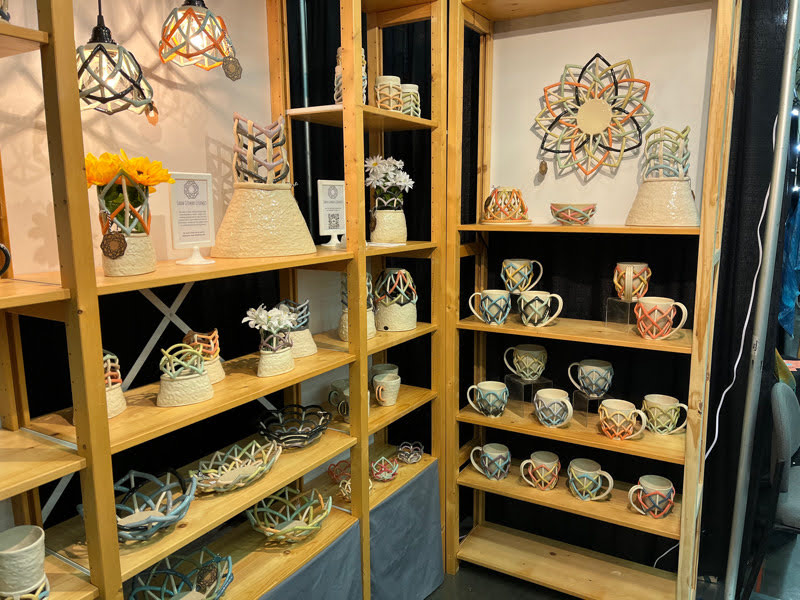
Over the weekend I went to to the American Craft Council show at the Baltimore Convention Center. It was great to see it back in person and of course I had to buy a few things to support the artists. The show was smaller than it's been in years past, but it was great to be back in person.
I finally got a replacement for the lithophane porcelin night light that my sweater hooked on and broke during covid.

They were so great I bought a second one. Now we have a light in the kitchen in addition to the hallway.

I also got some more left handed spoons for the cabin so I stop having to bring ones back and forth.

I spent the most I've ever spent on a mug from Sarah German Ceramics, but it was just so cool looking. It was in the first row and I didn't want to buy the first thing I saw, but we ended up going back at the end to pick it up

Everything in her booth was amazing. It was so hard to decide what to buy.

Last, but not least I got another necklace from a local Maryland artist - Sun Ah Blair. No that's not wood, its flexible clay! The work she does is so amazing and it's super light too!

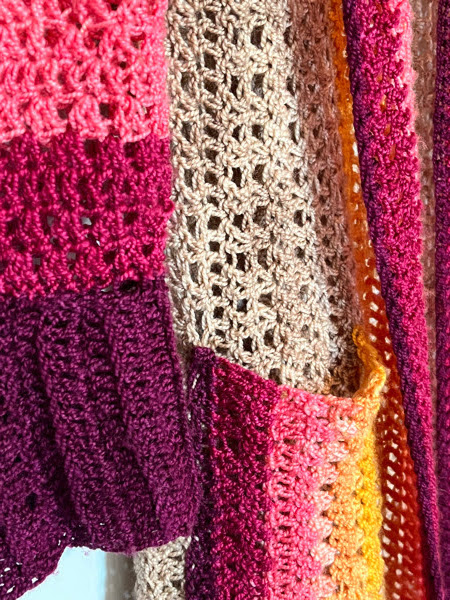
Why is this a mother in law sweater? Because I made it for my mother in law :) We were talking on Mother's Day and she confessed that the sweater I made her for Christmas a few years ago accidentally found its way into the wash. It's now only fit for a small child - literally. She didn't want to tell me, but also she loved her sweater and wanted another one. So as soon as I finished the Popsicle Sweater, I started on a new sweater for her.
This sweater is made from 2 skeins of Fourth of July yarn from Briar Rose. As I was making the pockets I ran out of yarn. I went through my remnants stash and found a pink yarn that I thought complimented it well. I made the pockets and decided it needed trim around the neck. Then I thought it needed it for the ends of the sleeves as well. I finished and was cleaning up - and found a small ball of the green I had from the first skein. Doh! I've decided the pink looks better than if it was all green.

I was in such a rush to send this off that I forgot to write down the pattern before I did. Going to do most of this from memory.
This sweater uses a 5 mm hook.
Start with the back panel. Cast on so it's long enough for the length, I did 70 stitches
Row 1: hdc across
Row 2-4: v stitch across (hdc 2 in a stich, skip a stitch)
Row 5: hdc across
Row 6: bobble stitch across
Row 7: hdc across
Repeat rows 2-7 until you reach your desired width. I did 5 repeats

The two side panels are the same as the back panel, but half the width. Sew the top and up the sides leaving about 8 inches for the arms (for an adult large). For the sleeves follow the same pattern, but work in the round. When you get to about elbow length start to crochet the last 2 stitches in the round together to taper the arms.
For the collar make sure the sweater is now right side out. Start on the bottom left corner and hdc up over and down. Then do hdc in the back loop only. Repeat in alternating rows until your collar is your desired width. I did 6 rows.

The pockets are the last piece. I used the same pattern as I did for the back and made it 14 stitches wide. My last 3 rows were in the pink color vs the green. The last touch was a row of sc around the collar and at the end of the sleeves.
Hopefully this is helpful. My patterns aren't as detailed as others are, but also I don't follow patterns when they are that detailed. I'm always changing it as I go to fit my needs. I'm hoping that others do the same.
I've needed to get online sales up and running for a while now. I was going to go back to etsy, but the fees just keep going up and up for them. When I did my first fair a few weeks ago and I signed up for square they sent me an email talking about their "free" online store. I checked it out and I'm happy to announce that I have an online store!!
The Ceramic Knot Square Store
I finally finished this sweater in the Sky Lounge at the Minneapolis airport on Sunday. I had started it a few weeks ago and then prioritized other projects for a variety of reasons. Then I became obsessed with finishing because I saw just how awesome this was going to be. This yarn is from Miss Babs and is the Popsicle Fun colorway. The pattern is my own.

Stitches:
Hdc – half double crochet
V stitch – 2 hdc in the same stitch, skip the next stitch
The back and the sides in the popsicle stick color are just rectangles. This pattern uses a 5 mm hook. Cast on enough to make the length that you want. I cast on 100 stitches. The pattern for the back and the sides is a row of hdc then two rows of v-stitch. I repeated the back 12 times and the sides 4 times. This made my back about 21 inches wide and the sides about 9 inches wide. I left a about 3 inches at the bottom not sewed and 8 inches for the arms.

Next I worked on the arms. I had all the pretty colors to work from! I decided to go from light to dark. I did the same pattern (1 row hdc then 2 rows of v stitch) and did 5 rows of each color. I went back and forth on this, but I figured out that with the length of my arms this was the right number of stitches. I did this for all of the colors except the last one. I am possibly a little too organic when I make my sleeves, but I don't decrease until the sleeve is about the length of my elbow and then I just gauge how much I want to taper in each row.
For the last color I cast on 18 stitches and then alternated hdc and back loop hdc. I made it the same number of rows as I had stitches in the bottom of my sleeve - 20. Then sew the top and bottom together and then to the sleeve.

Next I made the pockets. I knew I wanted to use as much yarn as possible in the collar and I didn't want to run out. I measured my hand against the sweater and decided I wanted my pockets to be 18 stitches deep so I cast on 18. I also knew that I wanted them to be about 10 rows wide and that I only had 7 colors so I picked 3 colors to do 2 rows vs 1. Same pattern - 1 row hdc and then 2 rows v-stitch.

Last but not least the collar! I had more of some yarn than others based on how much I had used in the arms and the pockets. I started light to dark again and used the same pattern I used for the bottom of the sleeves - 1 row of hdc and 1 row of back loop hdc. You want the sweater to be right side out and then start at the bottom left corner. You go up the side, across the back, down the other side - and repeat. For the colors I had less of I didn't worry if it ended mid row, I just switched colors. You can't tell unless you're looking at it really hard. I ended up with 15 rows for my collar. I kept trying it on to decide how it felt and how much more I needed.
As always when I make a new sweater it becomes my new favorite. This one is light enough to wear when its a bit warm. I wore it to a work event and got tons of compliments.
I spent the weekend in Iola, Wisconsin population 1,195 this week with Michael Harbridge from Learn Fired Arts. The workshop was absolutely fantastic. I knew from his videos that Michael was super knowledgeable and a really nice guy, but he also has amazing project management skills to work us through a whole lot of techniques in a most efficient way. As someone who considers themselves pretty damn good at project management – that’s high praise from me.
The workshop was Friday, Saturday, Sunday with full days (8-6) on the first two days and a half day (8-12) on Sunday. Unfortunately Delta moved my flights on Sunday so I ended up missing the last hour and a half on Sunday, but only ended up missing finishing the last two projects. I’m super bummed about missing the horse hair and naked raku, but I’m positive my pieces came out amazing.
One of the amazing things is that we finished a piece on day 1. We started the day working on a bisque piece that at the end of the day we raku’d. I am incredibly happy with how this vase came out.

We used a stencil and glaze that had been mixed with silk screen medium on the piece. Here it is before it was fired.

I am absolutely in love with the jade gloss glaze that Michael sells.

We also did a low fire technique on some bisque pumpkins with the Mayco Cobblestone. It looks a bit of a mess before.

But then BAM! Gorgeous Pumpkin!

We also did a non fire technique on these vases with a new product that Michael doesn't have for sale quite yet. It was basically like finger painting and I had a lot of fun.

On Saturday we started playing with clay. I have the wide cone puzzling mold and the poinsettia leaves at home, but I hadn't had a chance to make the tree yet. This was the perfect opportunity! There are nearly 100 leaves on that tree. I can't wait for Michael to bisque and send it to me so that I can glaze.

On the left is the gravity defying leaf bowl that I made in a sphere puzzling mold. On the right is the witches hat that I went off script on. We were supposed to make a snowflake tree, but I already have one at home. Michael had been talking about witch hats and so I ended up making one :) I can't wait to glaze the leaf bowl. I think it's going to look awesome. I need this mold :)

There are a few more projects that I didn't take pictures of that I have to patiently wait for Michael to mail to me. Overall it was an amazing weekend and I definitely plan to go back in future years. Shoutout to Michael's wife Jeanine for catering the whole event with amazing meals.
The planter made it through! The planter made it through! Seriously, this is by far the biggest thing I've ever made and I was sure that it was going to fail somewhere in the process. Now to make another one! The next one is going to be the base for my next garden stack.
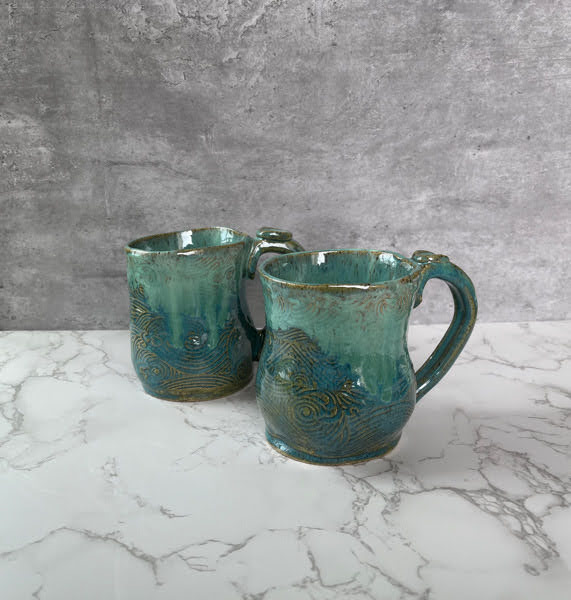
I love how the calla lillies came out. They're just so graceful. Clearly I was feeling the blue green vibes when I glazed. Three different glaze combinations with very similar results. Not a lot in this kiln because the planter took up so much room.


 Kentucky Mudworks Morning Glory x3 2167 clear over the heart(Inside)


