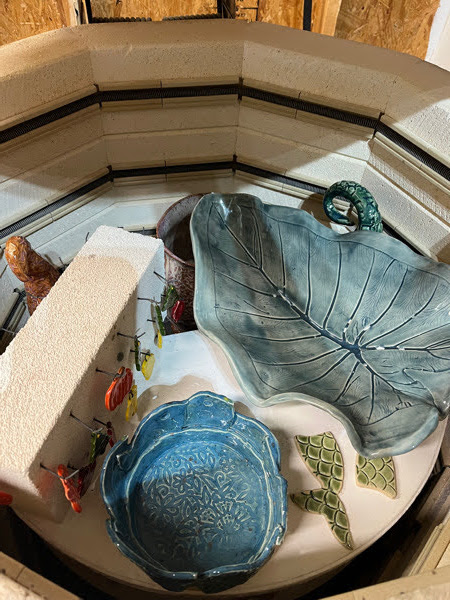
I love how the big bowl (in the first 2 pictures below) turned out. It was originally created with a spiderweb placemat and I intended it as a Halloween decoration. When I went to glaze it, I had a new vision and I love it.
Spectrum's Kimchi on Laguna 66 is amazing. It's even more amazing on my little footed planter. I'm also loving how the Midnight Sexy Mermaid came out on my little hosta leaf bowl.
All of of the birds, tulips, unicorns, fishies, and mermaid tails will end up being magnets. I love how they turned out and the variety of them.
A reminder - I will be at the MacKenzie-Childs Artisan Craft Festival this coming weekend September 30th - October 2nd. Hope to see you there!
Right off the bat I am really bummed about the crawling on the elephant ear bowl in the top right of the picture. I have had this happen before with speedball underglaze and the Amaco celadons. I thought that maybe it was that I wasn't letting the underglaze dry enough before putting on the glaze, but since I let this dry overnight that theory can't be right. I think I'll just have to give up that combination. I've mostly switched to the Mayco underglazes now, but I do really like this combo (sea blue and fog). I'll have to reglaze, but I'm not going to try to push it before the art show next week.
The question is.....can I do a bisque and two more glaze fires before we have to leave for the Mackenzie-Childs Artisan Fair? Do I HAVE to get that all in? Probably not, but I'm stressing about it so I'm going to try. As soon as a I unload this kiln, I'll reload and start up the bisque. I want to fire a few of the leaf vases, egg trays, and more appetizer plates.
You can see on the top shelf this kiln has some fall jewelry. It also has a gaggle of gnomes, a number of appetizer plates, and a whole lot of magnets.

The leaf bark bowl looks even better not through the crack in the kiln! I'm love how it turned out. Now to re-create it at home! My leaf platter also turned out amazing. Really hoping that others like it.
My fears on the vase were warrented, but I still like it. Going to make another. Also need to make one with the specked clay because I'm really loving how the soap dish with the same texture came out.
My egg tray is a re-glaze. I'm still not happy with it, but it's better than it was.
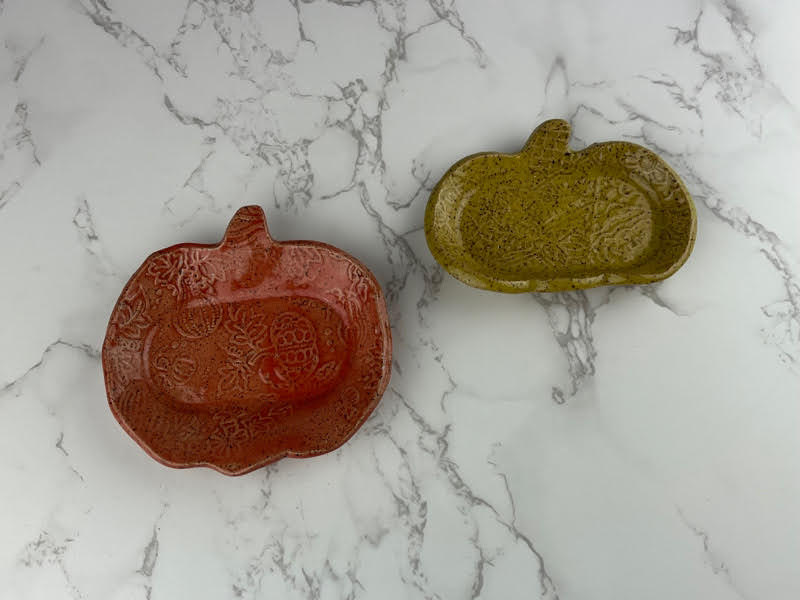
I am loving Coyote Papaya on speckled clay for pumpkins. Not sure if it would be a glaze I'd use regularly, but for that use I'm really digging it.
Not a ton of things in this kiln because there are a lot of tall pieces on this top shelf. I love the leaf bark globe at the bottom of the kiln. That's from my workshop with Michael Harbridge. It came out better than I can imagine. The witches had at the top is also from that workshop, rather disapointed with how that came out. I had hoped to make the spiders pop. I'm worried the vase in the top right didn't come out like I wanted it too, but I can't really tell yet.
On the very bottom of this kiln is a leaf platter I'm hoping turns out well. I hate waiting!!

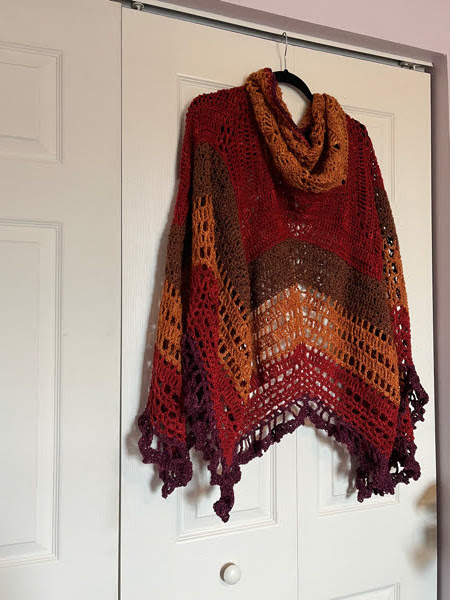
I started off wanting to make a butterfly shawl, but with these colors I think leaf is much more appropriate. This yarn is from Feederbrook Farm and is their silk DK weight yarn. I bought this at the Maryland Sheep and Wool and the colors aren't listed, but its 2 skeins of a burnt orange color, 2 of a cranberry red color, a skein of dark brown, and a skein of a nice deep purple for a total of about 1500 yards.

This didn't come out exactly perfect as the top isn't entirely flat, but once its on you'll never notice it. I think it's because of the different types of stitches that I used trying to create some different texture. The single crochets definitely aren't as wide as the other stitches. I used the same color until it ran out and always switched on rows.

This uses a 4 mm hook.
Stitches used:
ch - chain
ch sp - chain space
sc - single crochet
hdc - half double crochet
dc - double crochet
tc - treble crochet
bphdc - back post half double crochet
bpdc - back post double crochet
shell - 2 dc, 2 ch, 2 dc
v-stitch - 1 dc, 2 ch, 1 dc
sk st - skipt stitch
bobble - yarn over, pull up, yarn over, pull up, yarn over, pull up (7 loops), pull all the way through
picot - chain 3, insert the hook into the same stitch and pull it through
Start with a magic ring with the orange
Row 1: ch3, 7 dc, 1 trb
Row 2: ch3, 1dc in same st, *2dc in next st*. Repeat from *. In the last stich 1 dc and 1 trb
Row 3: ch5, sk st, *1 dc in next 4 sts, ch 2, sk st. Repeat from * 1 tc in last st
Row 4: ch3, in the chain space (1dc, 2ch, 2dc), *sk st, 1 dc, ch2, 1 dc, sk st, shell in the next ch space *,
Repeat from * once. Sk st, 1 dc, ch 2, 1 dc, sk st, in next ch sp 2dc, 2ch, 1dc, 1trb in last st
Row 5: ch3, sk st, * in next ch sp shell, 1 dc, sk st in the next 2 sts, in next ch sp v-stitch, sk next 2 sts, 1 dc. Repeat from *. In the last ch sp shell, sk st, 1 tc in the last stitch
Row 6: ch3, sk st, 1 dc, *In next ch sp shell, dc, dc, sk 2 sts, v-stitch, sk 2 sts, dc, dc. Repeat until end with a tr in the last stitch.
Ok so here is the pattern to follow for the rest of the shawl - in row 5 there was 1 dc between the shell and the v, in row 6 there were 2, in row 7 there will be 3....are you seeing the pattern here? The number of stitches between the shell and the v increases by 1 every row from now on. That's the big secret for this. Like I said before I decided to make it texturally interesting so I experimented with different stitches. You can follow my path or create your own.

Row 7-9: dc
Row 10: alternate dc with 3 dc in the same stitch
Row 11: dc
ROw 12: alternate dc with 3 dc in the same stitch
Row 13: dc
ROw 14: alternate dc with 3 dc in the same stitch
Row 15: dc
Row 16: hdc
Change colors - red
Row 17: sc
Row 18-20: sc, ch
Row 21: hdc
Row 22: dc
Row 23: hdc
Row 24: sc
Row 25: bp hdc
Row 26: bp dc
Row 27: bp hdc
Row 28: sc
Change colors - brown
Row 29-30: 2 hdc in the same stitch, sk st
Row 31: dc
Row 32-33: 2 hdc in the same stitch, sk st
Row 34: sc
Change colors - orange
Row 35: dc, ch
Row 36: 2 dc in the same stitch, sk st
Row 37: dc, ch
Row 38: 2 dc in the same stitch, sk st
Row 39: dc, ch
Row 40: sc
Change colors - red
Row 41: hdc, ch
Row 42: dc
Row 43: hdc, ch
Row 44: 2 hdc in the same stitch, sk st
Row 45: hdc, ch
Row 46: 2 hdc in the same stitch, sk st
Row 47: hdc, ch

Continue to use the red at this point to do a sc across the flat top. This helps to even it out if it hasn't been even.
Change colors - purple
Row 48: bobble, ch
Row 49: tc, ch 3. In the shell spaces ch 5 instead of ch 3
Row 50: * sc, hdc, dc, hdc. Repeat from *. In the shell space - sc, hdc, dc, tc, dc, hdc. For the v-stitch make sure you still sk a stitch then just sc in the 2 chains
Row 51: sc in the sc and hdc stitches. Picot in all the dc stitches (and in the tr for the shells)
When you get to the end sc across the top again.


