
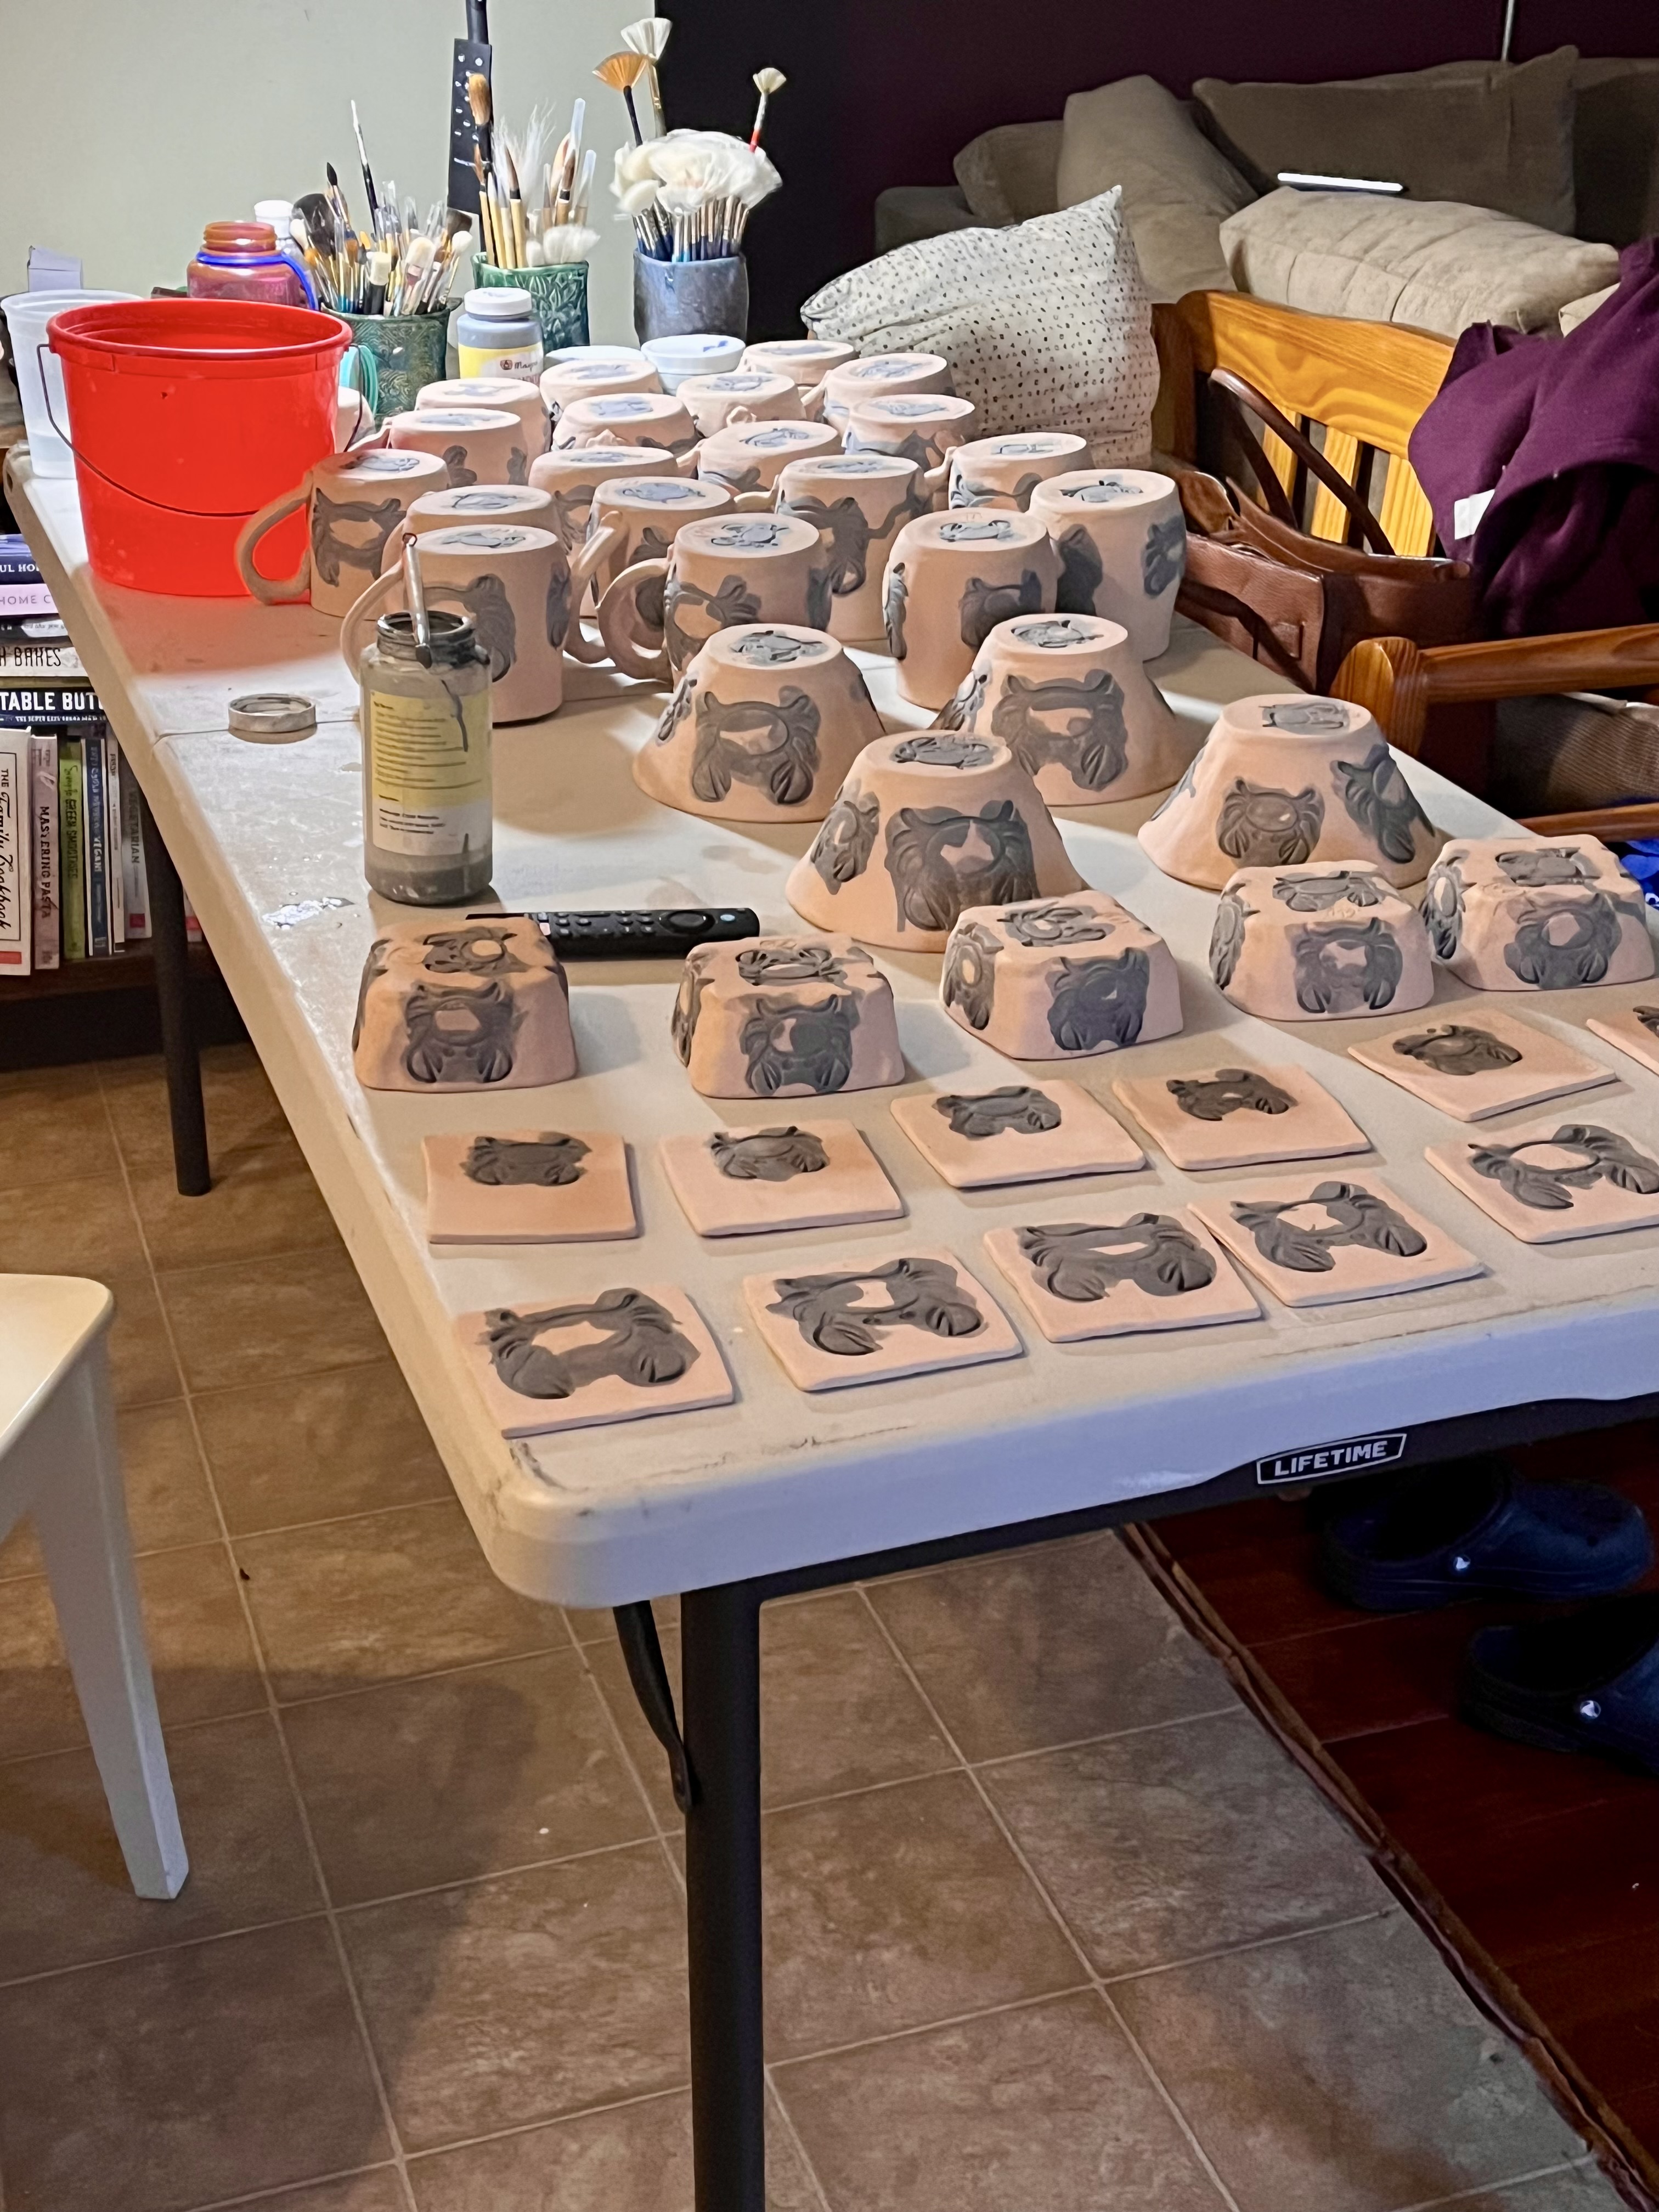
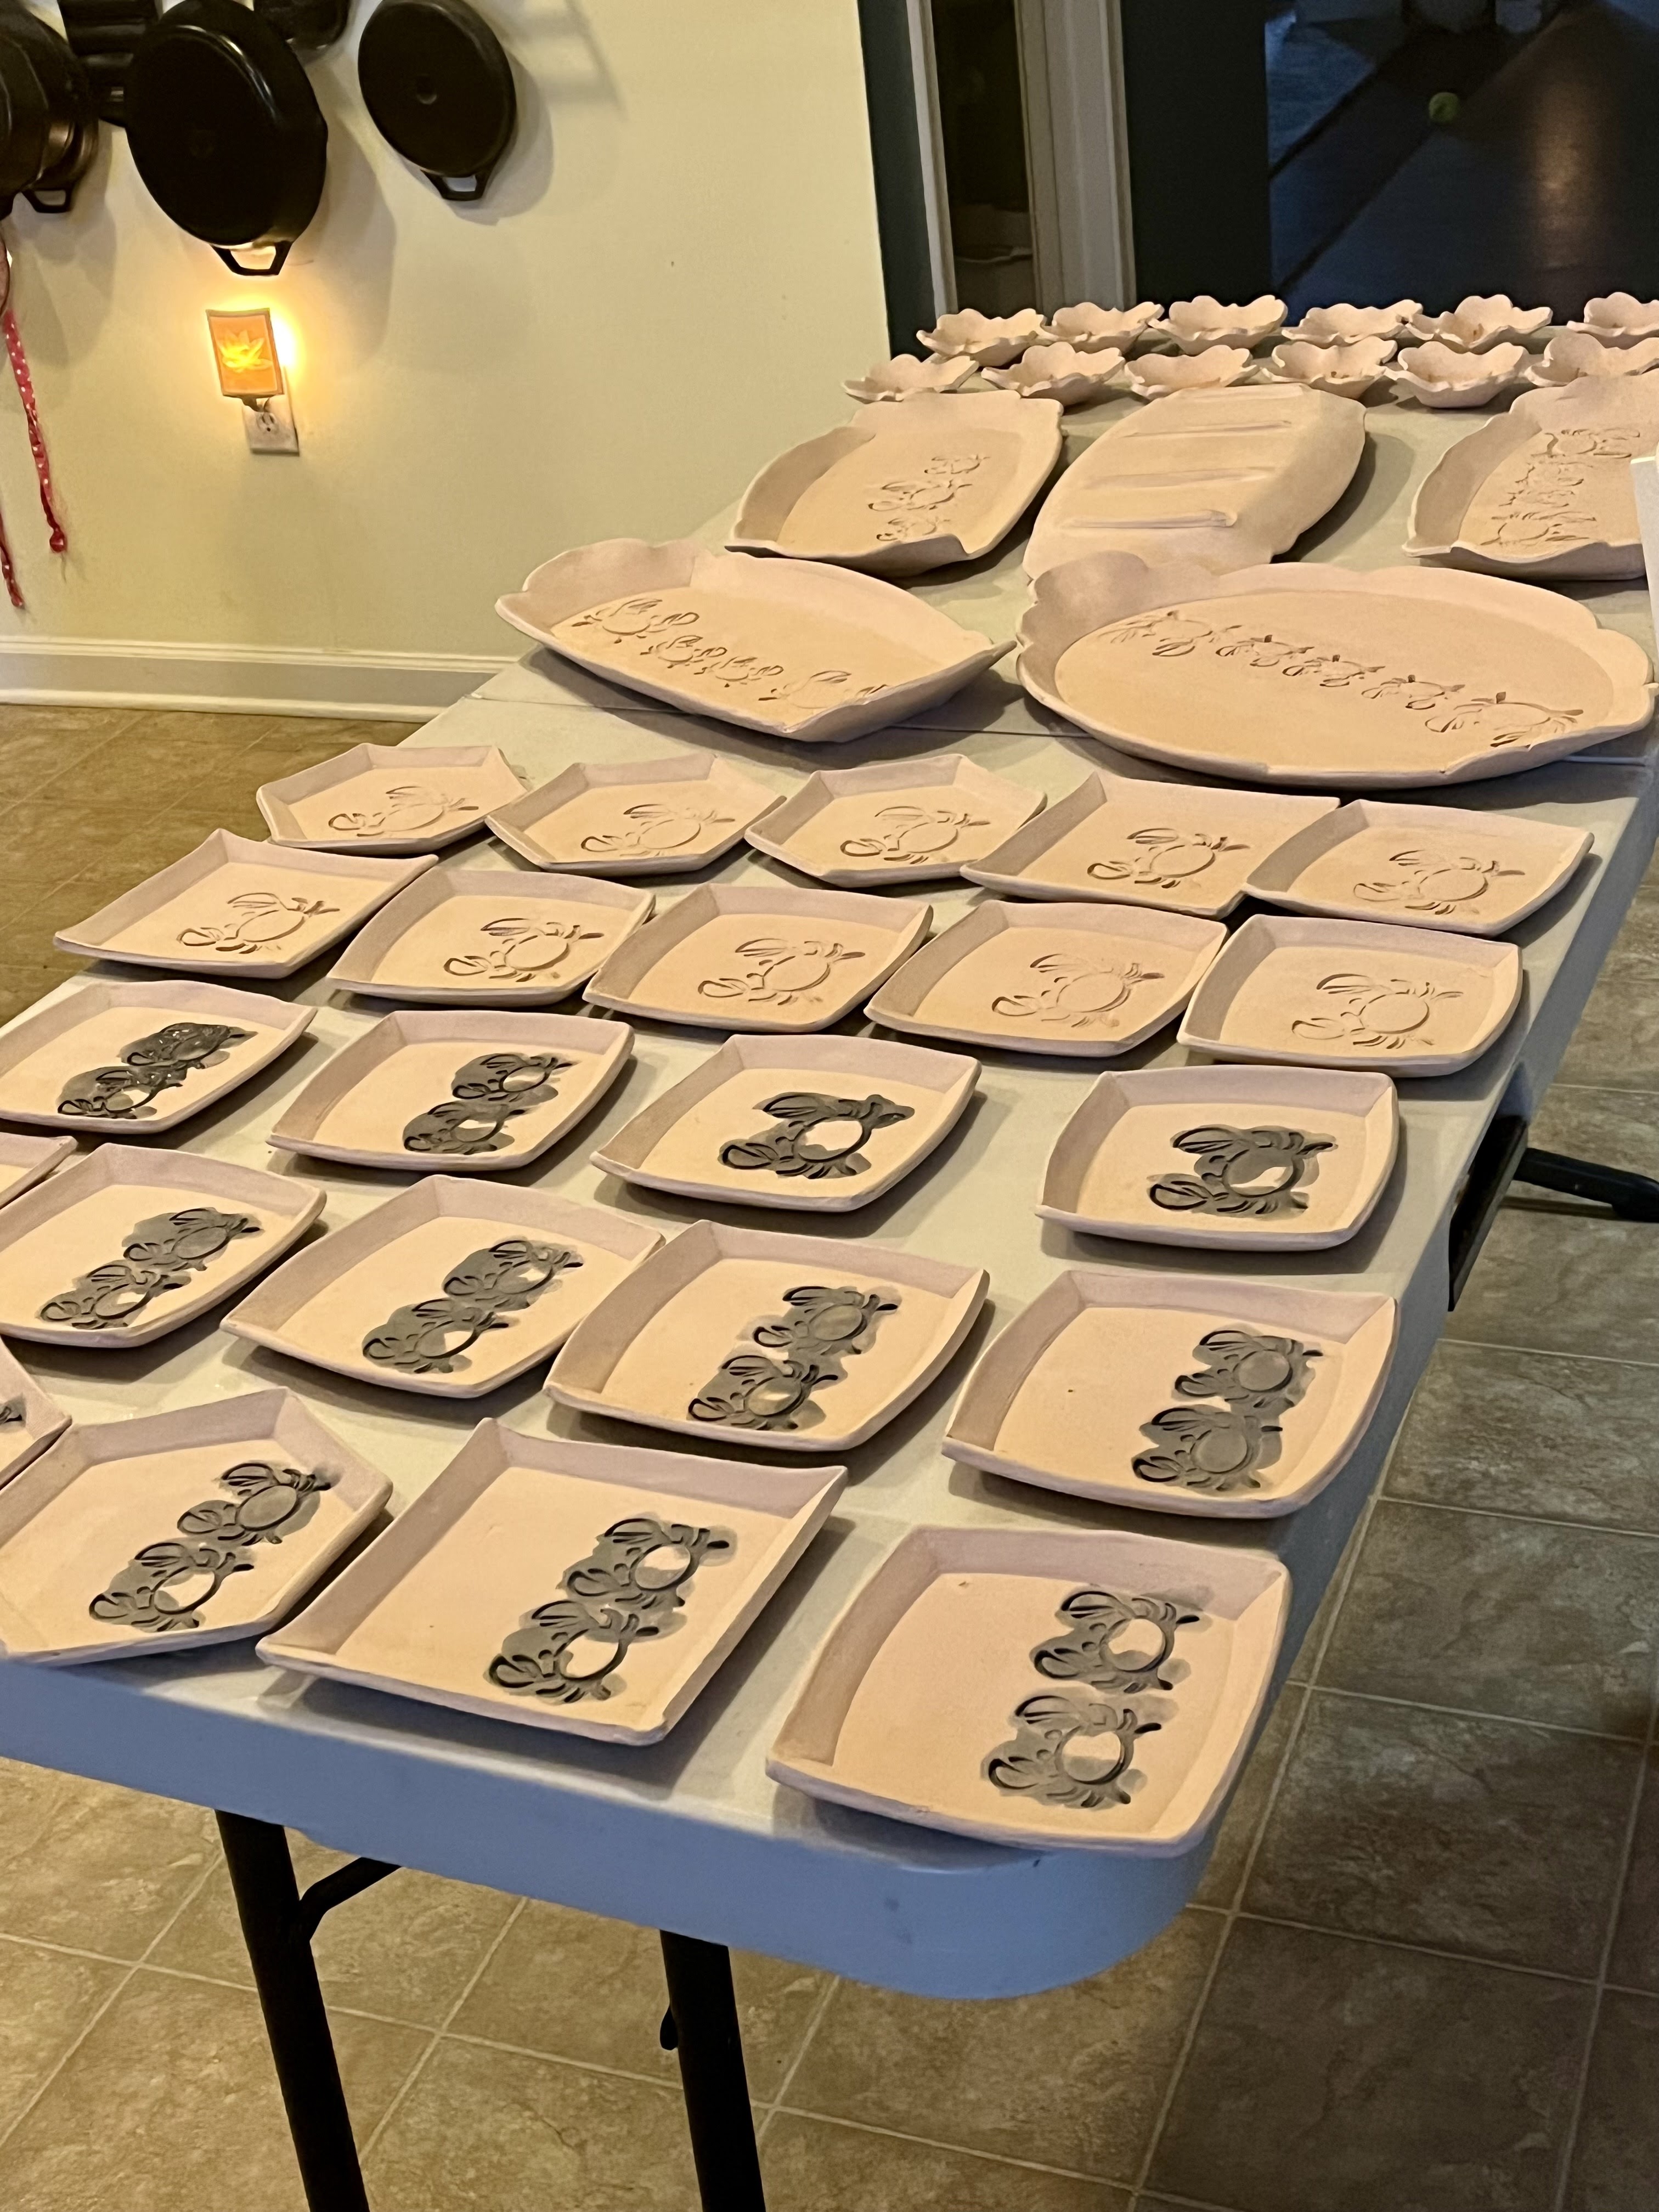
I'm finally getting around to glazing everything I've made in 2024. It's at least 3 kiln loads, but I'm guessing a few things won't fit in that. I started with all things crab. I was watching ClayShareCon on Saturday while doing this and it took me all day. I did all the crab arms and legs first, but in batches. In my day job I spend a lot of time getting teams to break things into smaller batches and to stop starting and start finishing. I'm always looking for ways to apply that to the rest of my life. Since the arms and legs take so long to do I broke it up doin a half a table at a time. Same for when I was glazing. I feel like it made the whole thing go faster.
Speaking of ClayShareCon, it was amazing. It's hard to pick favorites, but here are a few:
Colorful Clay Plants - Michael Harbridge (this one is only available to prime members)
Hydrangea and Bluebirds - Paula McCoy (also prime only)
Monoprints and Clay Bisque - Kathy Skaggs
Decals Can When Brushes Can't - Melanie Kaffl
Making a One-Piece Travel Mug with a Handbuilding Jig - Alex Mente
Scoops, Spoons and Square Stacking Bowls - Debbie DelaCruz
Pattern Placement for Shaping - Annie Crietzberg
Honorable mention - the reveal of the new 2024 Mayco Glazes. I can't wait for them to be available in March. I think that Purple Aster is going to be a new favorite of mine. I already love Lavender Mist, adding blue crystals can only make it better. I'm also intrigued by the engobes. Not sure how they'll play into my work, but we'll see. Another to the Raku Firing of leaves with Michael Harbridge.
I feel like I bought less than I have in years past now that I have a a lot of things already, but still will have a few new toys in the near future. The discounts last week were amazing.
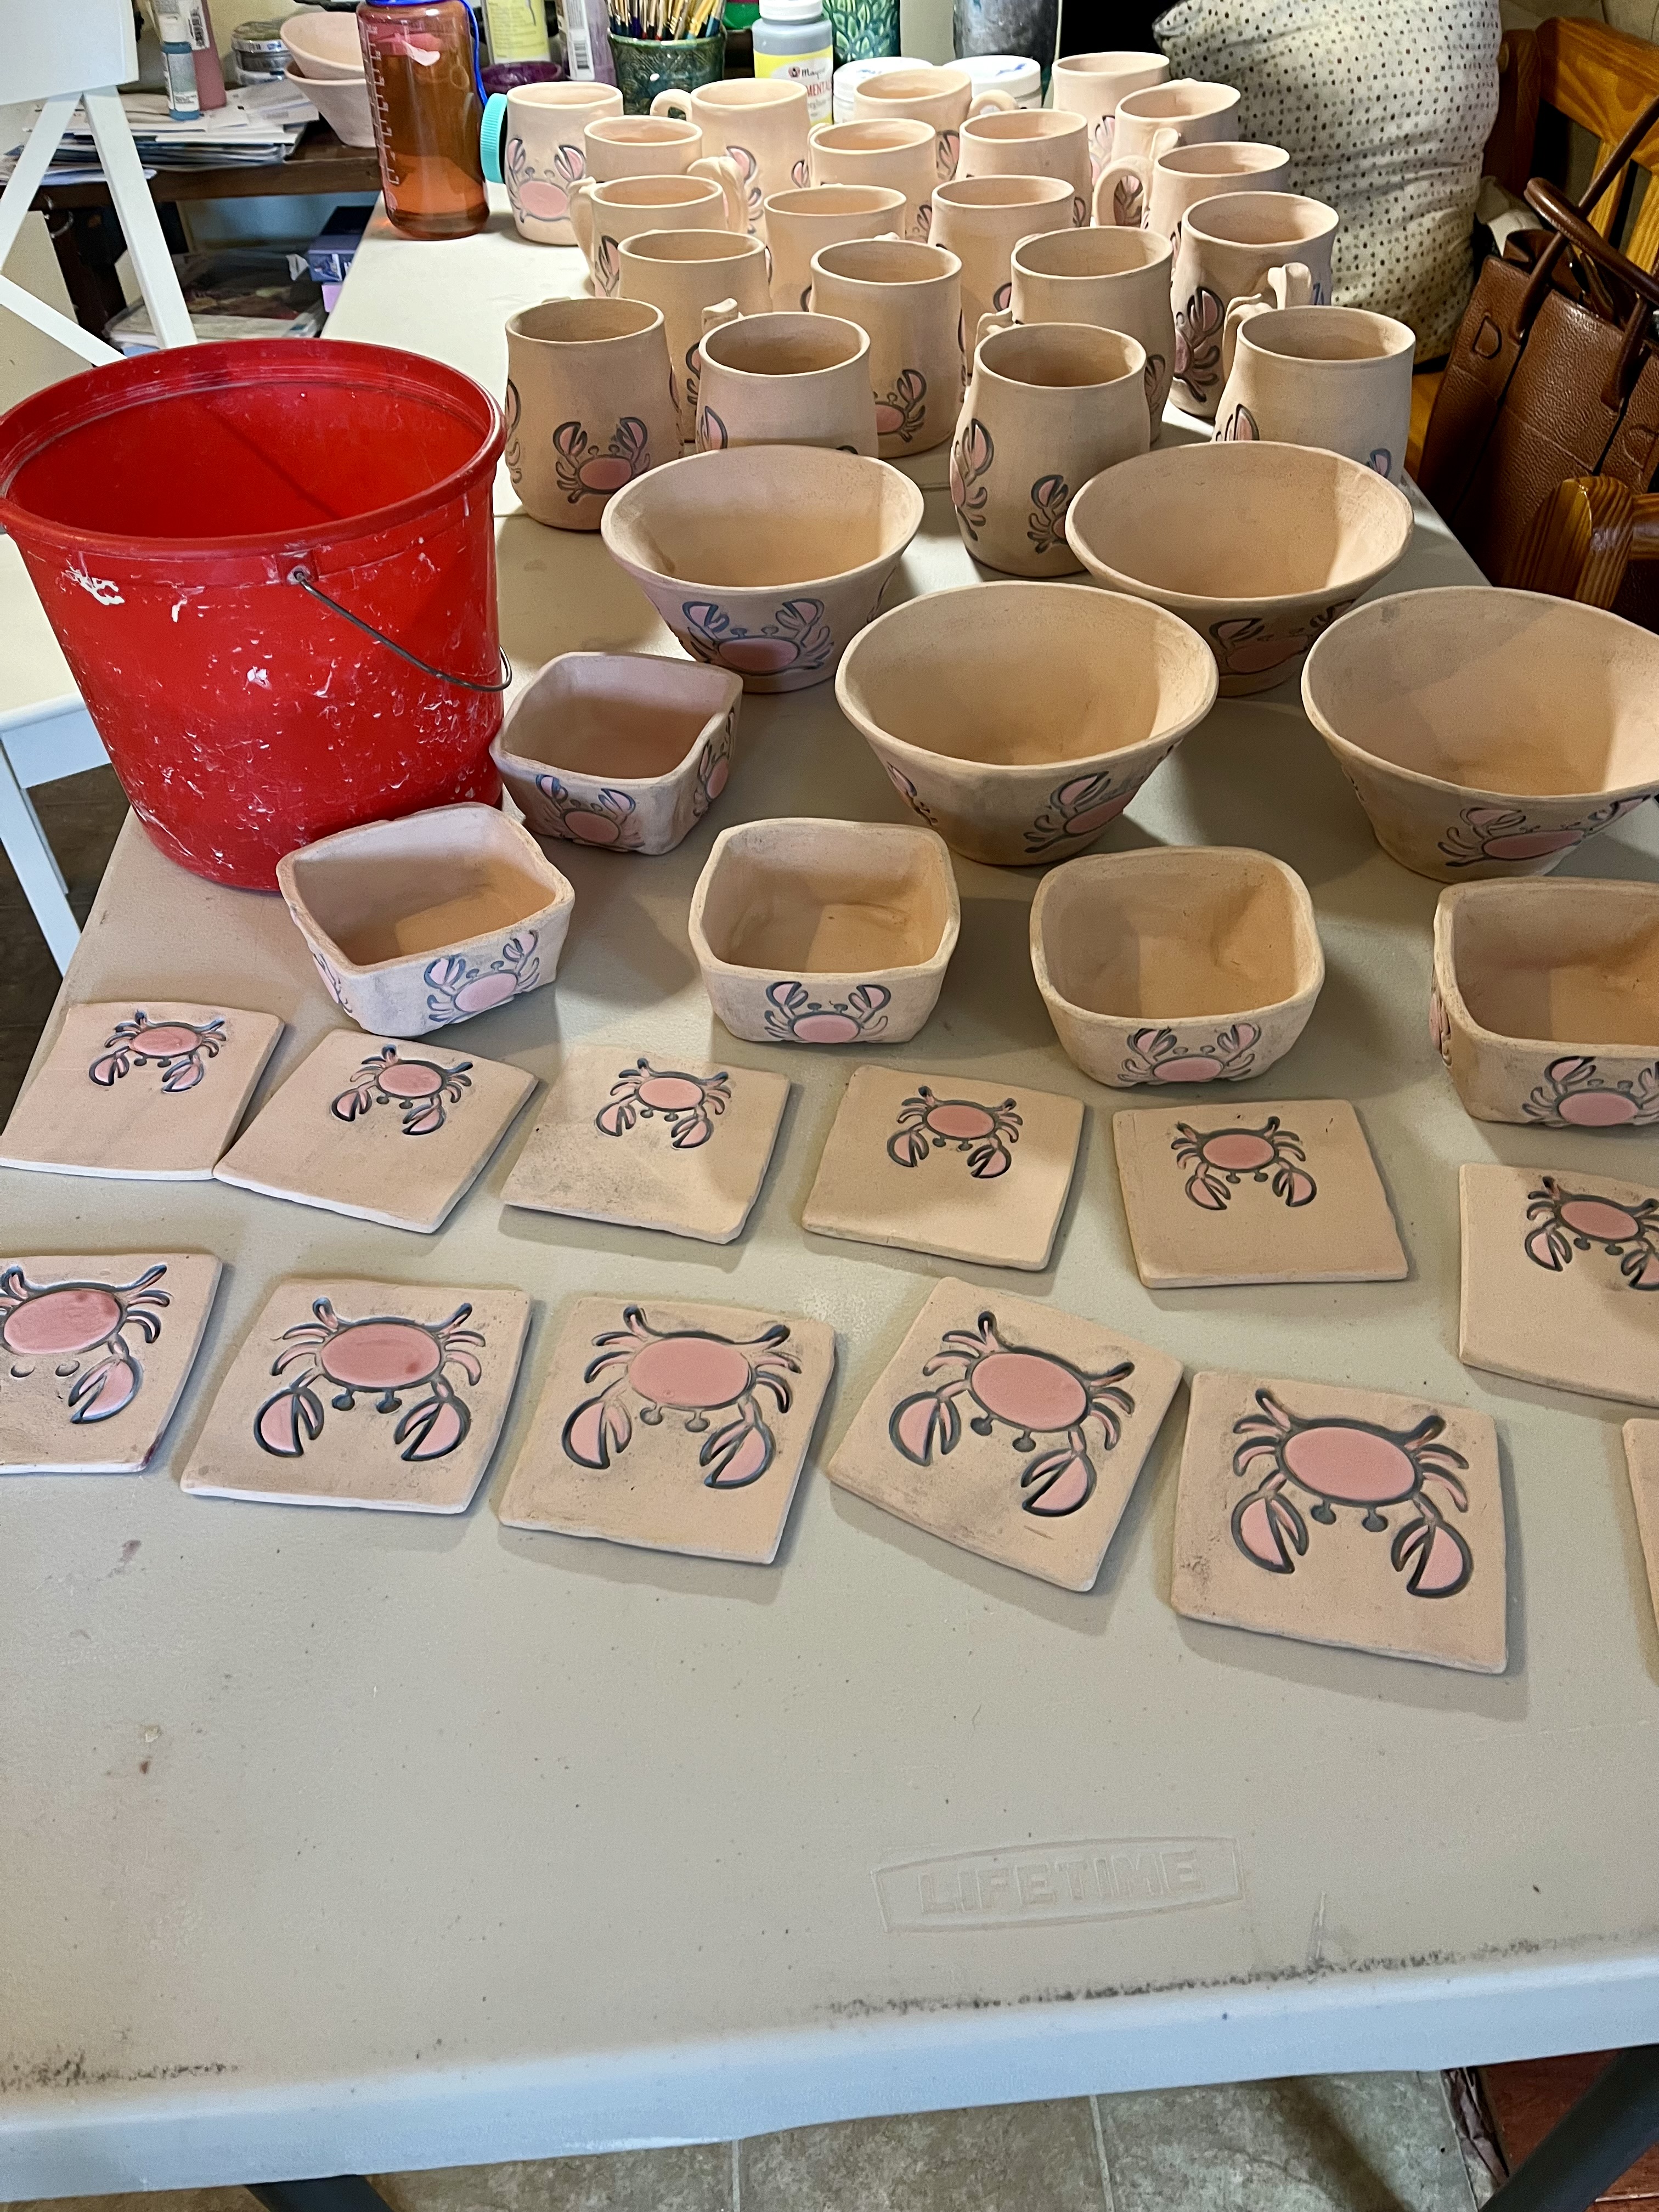

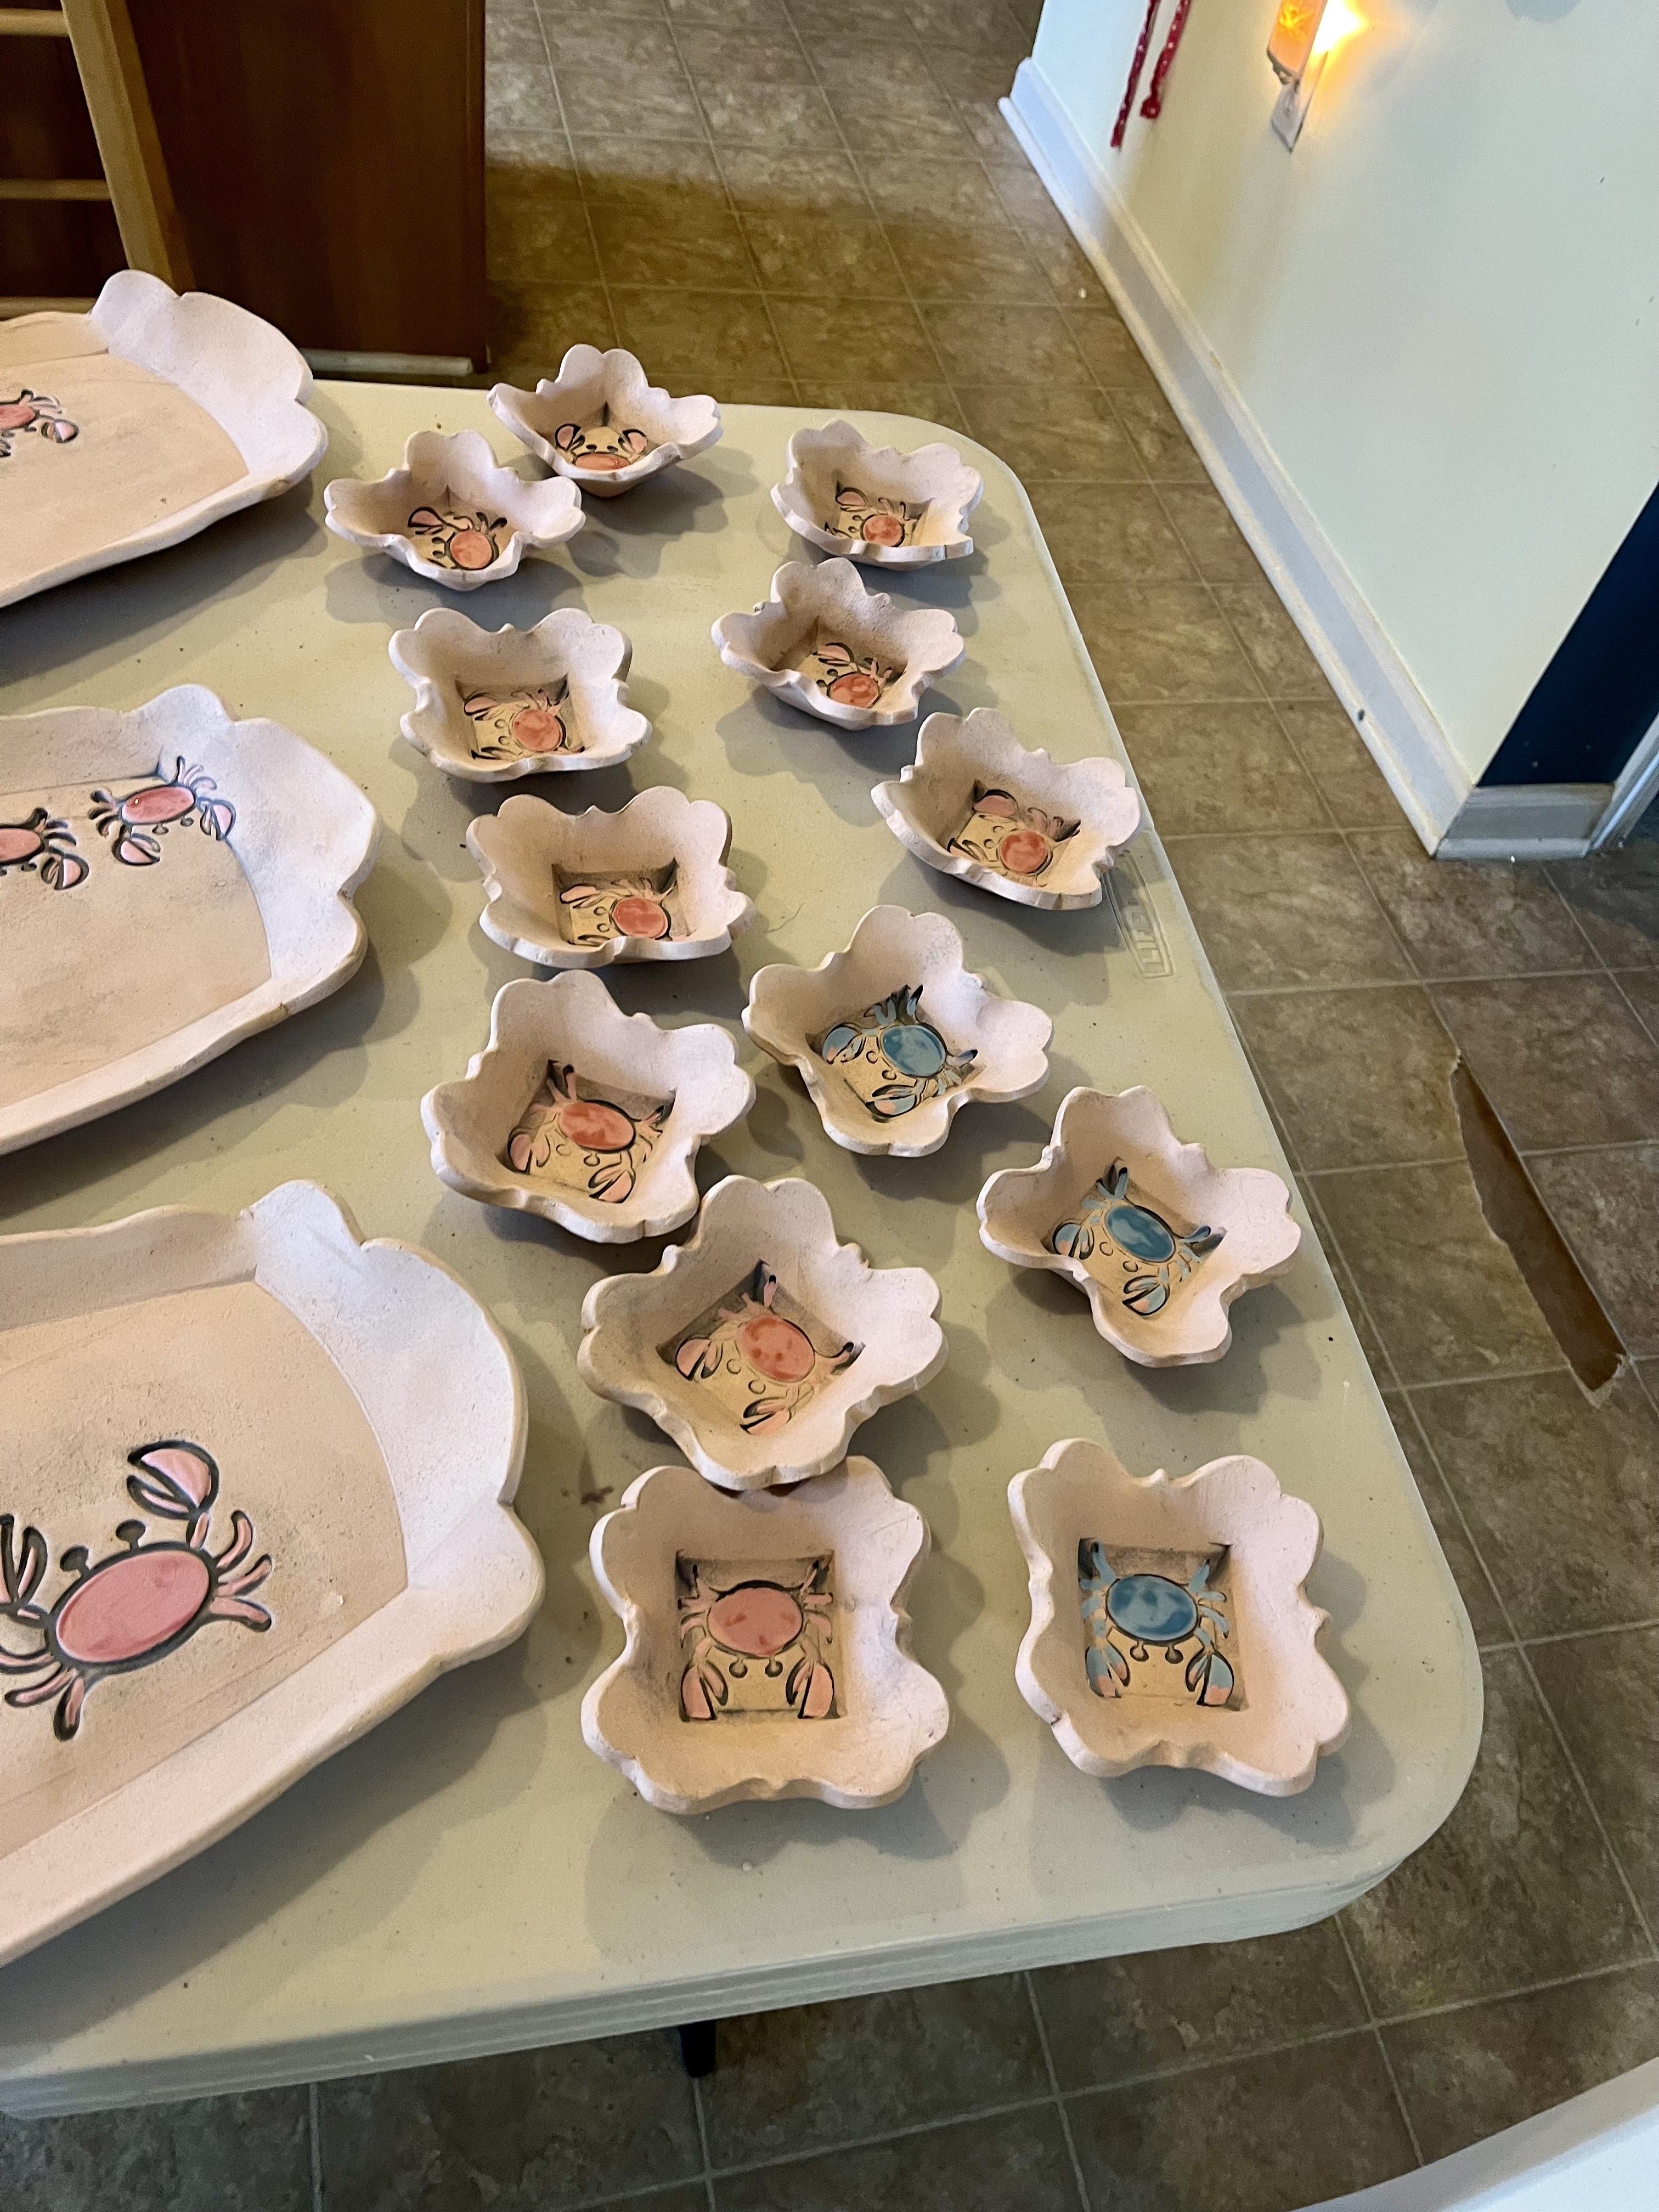
Doing a test with some blue crabs for Maryland. We'll see how those turn out soon!
Last week I saw a studio tour during ClayshareCon (more on that tomorrow) and I saw the puzzling forms being stored wrapped in their velcro vs piled. I decided to give it a go and it actually freed up a lot of space (good thing since I ordered more). While I was there I reorganized my gr forms as well based on what I use most frequently vs trying to keep shapes together. I'll keep you posted how this works out.

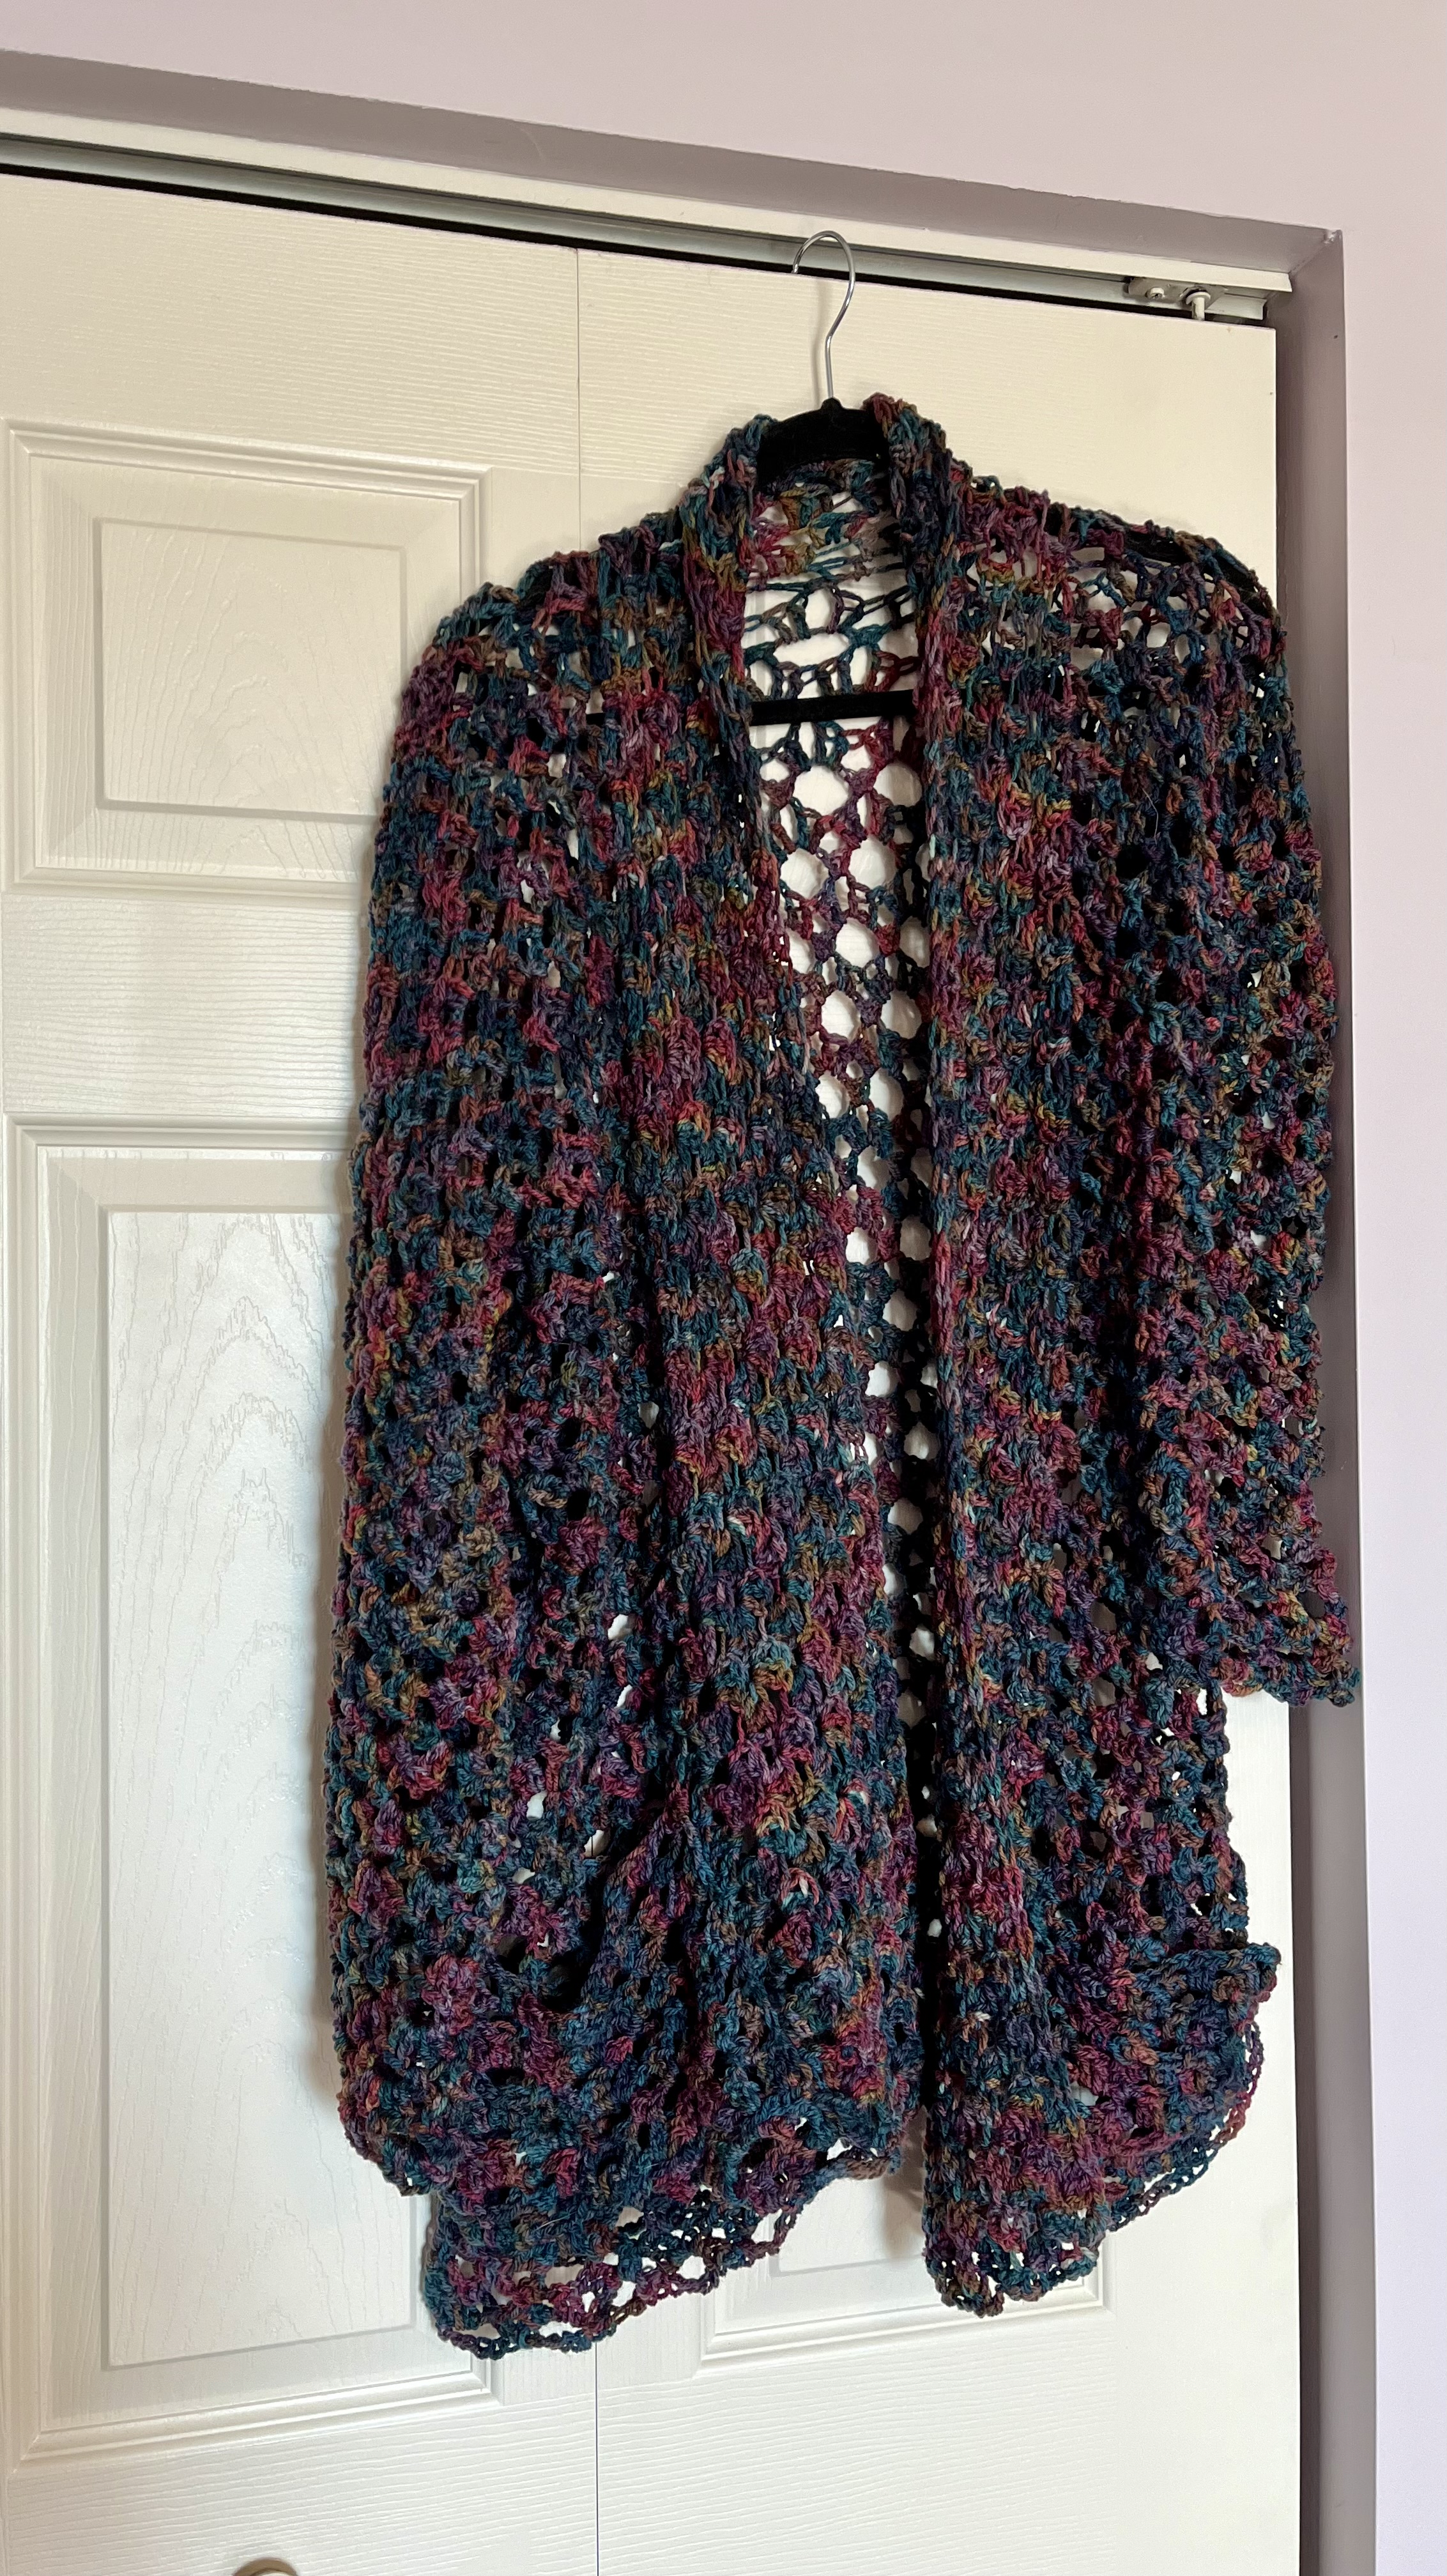
I loved this yarn when I bought it, but it wasn't until I was actually starting to use it that I realized that it was rainbow colored, although definitely darker than your usual rainbows. I bought this yarn at the Maryland Sheep and Wool from Briar Rose Fibers. The actual colorway wasn't labelled, but it is their promises yarn. Their shop is currently closed so I can't link to it, but its a worsted weight yarn that is 500 yards a skein and I used nearly all of 2 skeins.
This worked up really quick while I was travelling last week. I definitely was getting looks as I was trying to sew it together in the Delta lounge late Thursday night. I have been travelling so much for work that I have barely touched clay. I have been watching a ton of videos though so I have all these ideas for when I have time this weekend. I also have 3 kilns worth of bisque to glaze, but I'm itching to make more vs glaze
Also ClayShareCon is this week so I know I'm going to have more ideas soon.
This pattern uses a 5mm hook.
Stitches:
ch - chain
sk - skip
hdc - half double crochet
sl st - slip stitch
Back panel
Cast on 81
Row 1: sc in the second stitch from the hook, sc, *Ch 4, sk next 4 chs, sc in each of the next 2 ch. Repeat from * across.
Row 2: ch 3, sk 1 sc, (2 hdc, ch 2, 2 hdc) in the next ch sp. *Sk 2 sc, (2 hdc, ch 2, 2 hdc) in the next ch4sp. Repeat from * across to the last 2 sc. Sk 1 sc, 1 hdc in the last sc.
Row 3: ch 5, sk 2 hdc, 2 sc in the next ch 2 space. *Ch 4, sk 4 hdc, 2 sc in the next ch2sp. Repeat from * across to the last 3 hdc. Ch 2, sk 2 hdc, 1 hdc in the last hdc.
Row 4: ch 4, 2 hdc in ch2sp. *Sk 2 sc, (2 hdc, ch 2, 2 hdc) in the next ch 4 sp. Repeat from * across to the last 2 sc. Sk 2 sc, 2 hdc in the last ch2sp, ch 1, 1 hdc in the last hdc.
Row 5: ch 1, 1 sc in the first hdc and 1 sc in the next ch 1 sp. *Ch 4, sk 4 hdc, 2 sc in the next ch 2 sp. Repeat from * across to the last 5 hdc. Ch 4, sk 2 hdc, 1 sc in the next ch 1 sp and 1 sc in the last hdc.
Repeat rows 2-5 until you reach your desired length. I liked the look better ending on a row 2/4 vs a 1/4. I have about 50 rows
Side panels - make 2
Cast on 41
Row 1: sc in the second stitch from the hook, sc, *Ch 4, sk next 4 chs, sc in each of the next 2 ch. Repeat from * across.
Row 2: ch 3, sk 1 sc, (2 hdc, ch 2, 2 hdc) in the next ch sp. *Sk 2 sc, (2 hdc, ch 2, 2 hdc) in the next ch4sp. Repeat from * across to the last 2 sc. Sk 1 sc, 1 hdc in the last sc.
Row 3: ch 5, sk 2 hdc, 2 sc in the next ch 2 space. *Ch 4, sk 4 hdc, 2 sc in the next ch2sp. Repeat from * across to the last 3 hdc. Ch 2, sk 2 hdc, 1 hdc in the last hdc.
Row 4: ch 4, 2 hdc in ch2sp. *Sk 2 sc, (2 hdc, ch 2, 2 hdc) in the next ch 4 sp. Repeat from * across to the last 2 sc. Sk 2 sc, 2 hdc in the last ch2sp, ch 1, 1 hdc in the last hdc.
Row 5: ch 1, 1 sc in the first hdc and 1 sc in the next ch 1 sp. *Ch 4, sk 4 hdc, 2 sc in the next ch 2 sp. Repeat from * across to the last 5 hdc. Ch 4, sk 2 hdc, 1 sc in the next ch 1 sp and 1 sc in the last hdc.
Repeat rows 2-5 until you reach your desired length. These need to be the same length as the back panel
Sew the front panels to the back panel leaving about 7 inches for the arms.
Sleeves
Row 1: ch 3, sk 1 sc, (2 hdc, ch 2, 2 hdc) in the next ch sp. *Sk 2 sc, (2 hdc, ch 2, 2 hdc) in the next ch4sp. Repeat from * across to the last 2 sc. Sk 1 sc, sl st to join. I picked up 10 of the 2 hdc, ch 2, 2 hdc
Row 2: ch 5, sk 2 hdc, 2 sc in the next ch 2 space. *Ch 4, sk 4 hdc, 2 sc in the next ch2sp. Repeat from * across to the last 3 hdc. Ch 2, sk 2 hdc, sl st to join.
Row 3: repeat row 1
Row 4: repeat row 2
Row 5: repeat row 1
Row 6: repeat row 2
Row 7: repeat row 1
Row 8: repeat row 2
Row 9: repeat row 1, but don't do the last 2 hdc, ch 2, 2 hdc - so you should have 9 instead of 10.
Row 10: repeat row 2
Row 11: repeat row 1
Row 12: repeat row 2
Row 13: repeat row 9 - you should end up with 8 now
Row 14: repeat row 2
Row 15: repeat row 1
Row 16: repeat row 2
Row 17: repeat row 1
You can adjust this to your desired length for your sleeves, I have kind of short arms and I made this on the short side. I like the look better ending on a row 1.

Colar
Turn the sweater right side out. Lay it flat in front of you and start at the bottom right corner.
Row 1: ch 3, (hdc, hdc) into the same space, *sk to the next chain space, 3 hdc. Repeat from * up the right side across the back, and down the left side, hdc in the last stitch.
Repeat row 1 for 9 rows or until you have your desired colar. I really like the thick colar on this one.
Pockets - make 2
Cast on 11
Row 1: sc in the second stitch from the hook, sc, *Ch 4, sk next 4 chs, sc in each of the next 2 ch. Repeat from * across.
Row 2: ch 3, sk 1 sc, (2 hdc, ch 2, 2 hdc) in the next ch sp. *Sk 2 sc, (2 hdc, ch 2, 2 hdc) in the next ch4sp. Repeat from * across to the last 2 sc. Sk 1 sc, 1 hdc in the last sc.
Row 3: ch 5, sk 2 hdc, 2 sc in the next ch 2 space. *Ch 4, sk 4 hdc, 2 sc in the next ch2sp. Repeat from * across to the last 3 hdc. Ch 2, sk 2 hdc, 1 hdc in the last hdc.
Row 4: ch 4, 2 hdc in ch2sp. *Sk 2 sc, (2 hdc, ch 2, 2 hdc) in the next ch 4 sp. Repeat from * across to the last 2 sc. Sk 2 sc, 2 hdc in the last ch2sp, ch 1, 1 hdc in the last hdc.
Row 5: ch 1, 1 sc in the first hdc and 1 sc in the next ch 1 sp. *Ch 4, sk 4 hdc, 2 sc in the next ch 2 sp. Repeat from * across to the last 5 hdc. Ch 4, sk 2 hdc, 1 sc in the next ch 1 sp and 1 sc in the last hdc.
Row 6: repeat row 2
Row 7: repeat row 3
Row 8: repeat row 4
Row 9: repeat row 5
Row 10: repeat row 2
Sew on the pockets onto the front panels. I did these 2 inches from the bottom and an inch back from where the colar starts.

I get asked all the time if my gnomes are ring holders. I thought I would try to make a few with that purpose. They are mostly the same as my normal gnomes except the hats are much straighter. I don't know why I added the bird other than I thought it looked really cute. I made one as just a ring holder without a gnome body. I like the simplicity of that one too.

A lot of people don't realize the time it takes to finish pieces. Generally I need 3 days in a row where I can work on pieces before I just leave them to dry. For mugs, cups, bowls, etc. that is.2 days in a row and then a third day a few days later when the rim is solid. I've been traveling a lot for work so it's made working on things difficult. Last week I put all my mugs, shot glasses, and the two wine goblets into my dry box to keep them soft enough that I could finish the rims.
This week I ended up getting home on Friday, but I was so tired that I did not make any pottery. I flew right back out early Monday morning so I didn't really have the time at home to make a lot of things. I really felt like making something though so I made some wine gnomes. These will eventually get glued onto corks.
All gnomes start as a couple of different pieces. I like to get the bodies, hats and noses made in batches as you see here. Then as I pick up each body, I decide which hat and which nose fits that body. Then each one gets a custom face.


I saw these glasses while watching the latest season of The Orville. They were conical on the top and cylindrical on the bottom. These are my first attempts at making them in clay. They leave a little to be desired.
I made this one first. It is the same top as a mug that I tried out from a class I took recently. I think the bottom this one is both too tall and too straight. I feel like asthetically the two pieces don't go together well. I carved in the lavender on the bottom and that actually helped make it more cohesive.

Initially I thought the problem was that the bottom was too tall for the top. It wasn't until later that I realized that there was a shape issue. When I realized the shape issue I flared out the bottom. Instead of carving this one my plan is to make the bottom a solid color (Lavender Mist) and see if that balances it out. More on this concept to come.


