
Something got me thinking about displaying and burning candles recently. I was thinking about ideas for design and realized that I have cone cutters from DeLa Designs. I decided to start there, but quickly realized that I needed a wider base. On the first one I cut a couple of time to get to the right width. However, after the first time I knew about how much I needed so I set the tops aside (more on this later!).
The cutter I used on the top was also from DeLa Deisgns. I think it was a sunflower cutter. I let the two separate pieces setup just enough so the flower wouldn't sag and then slip and scored really well. I also added a coil on the outside.


Quick update on fixing images - I am continuing to work through fixing the images on the blog. It's a very manual process, but I have everything from March of 2023 to the present fixed. As I have an hour here and there I'm making the updates. It's tedious so I can only do it for so long before I need a break.
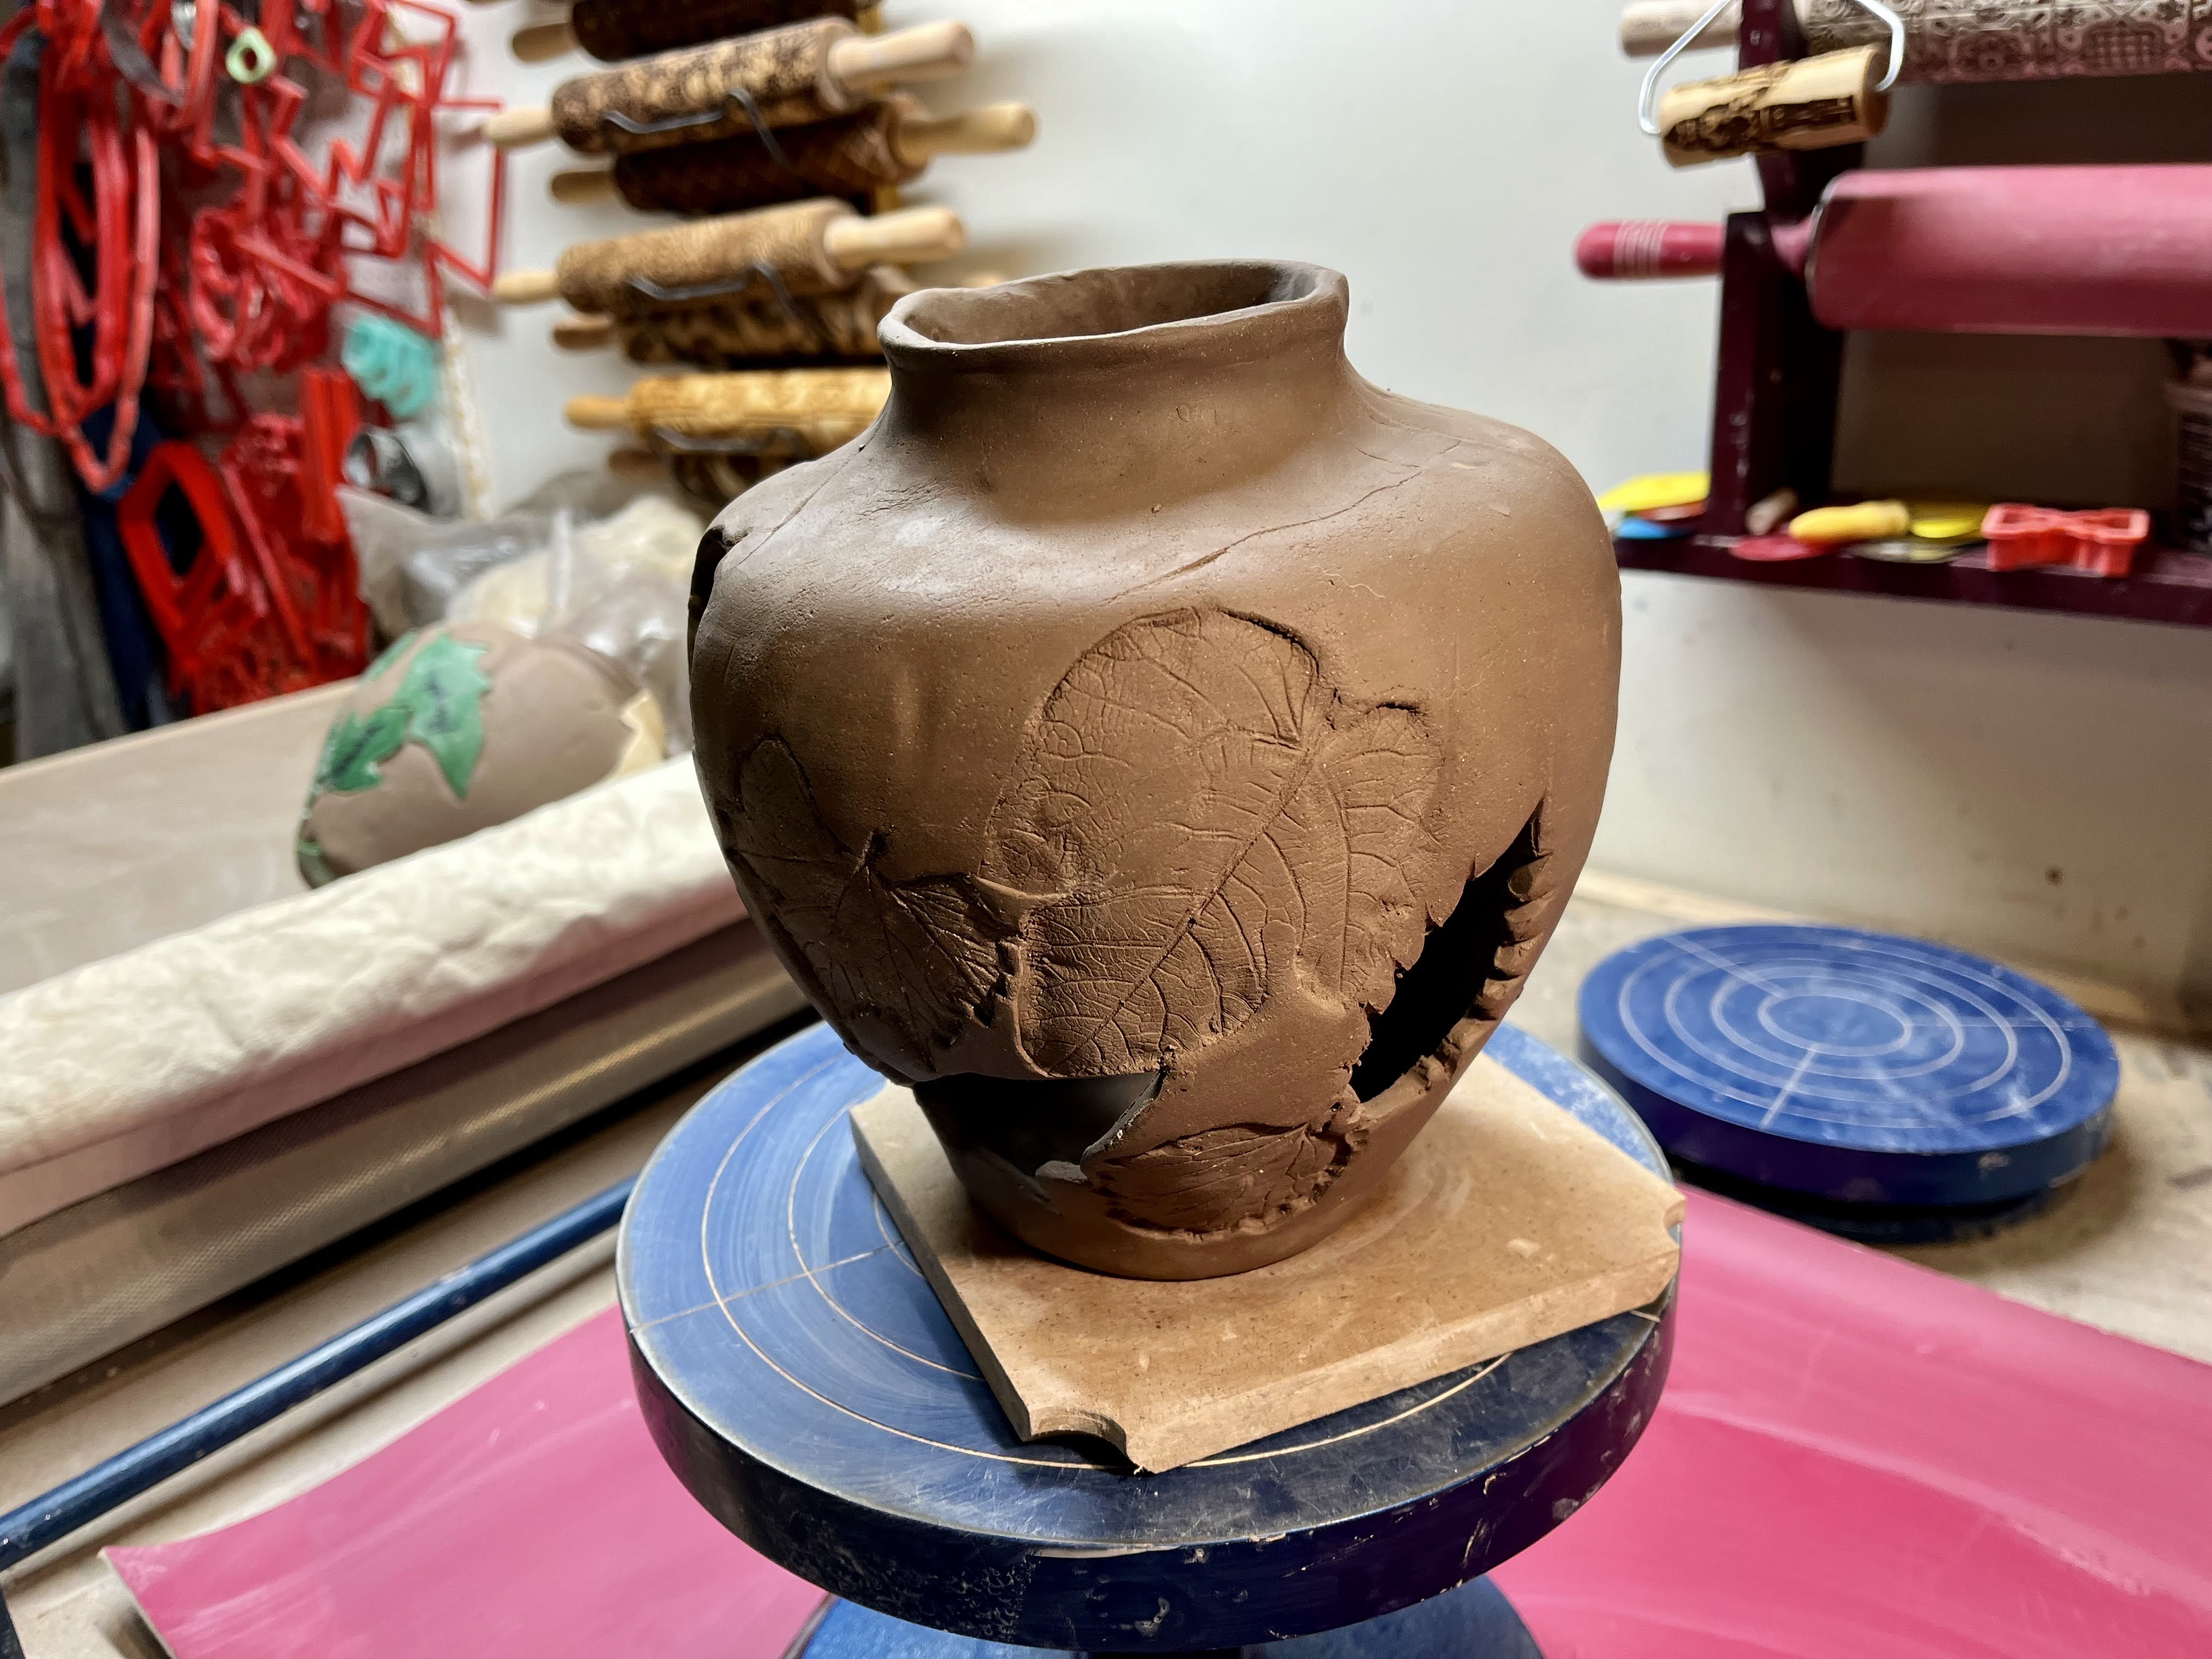
I was making several leaf vases and had an interesting turn of events. When I was taking off one of the leaves there was a slight tear where the clay had just gotten too thin. My first instinct was to smoosh it, but before I could act on that instinct I thought - what if I cut out the leaves?

This is what a normal vase looks like without any leaves cut out. Eventually I glaze the leaves and leave the rest bare clay with a coat of clear.

Initially, my thought was to cut out all the leaves. However, for this particular vase several of them were really close together and I thought I'd have a structural problem. I still might do that (on purpose this time) for a future vase, but for this one I started to strategically cut out leaves.

I made sure to do cuts on all sides so that it would have a more uniform look. I think in the end my mistake is going to end up being a really cool luminary.
During ClayShareCon I was enamored by Alexandria Pottery's handbuilding jig. I bought the travel mug jig with the cutter and an extender. It essentially a 3D printed flexible tool with a "key" that has two positions - one for building and one for getting it out. Alexandria did a video on this and I highly recommend watching her if you're interested. She's much smoother at it than I am having practiced.
I started with the simple shorter practice mug. Alex makes 3 holes in the top, but that felt like a lot at once so I'm starting with one. In all likelihood I'll find that she's right and I'm wrong, but my plastic travel mug only has one hole so in my head it doesn't make sense to have 3.

My second one is slightly better than my first.

Using the extender its only 2 inches taller, but it made a world of difference. Cornstarch was helpful with the regular jig. With the extender it was necessary! I lost my third tall one when I forgot the corn starch.

For the first one I made I wasn't really thinking about where to put a handle so I ended up creating an indent and a little nub to help hold it up. I think it will be ok, but it's also all an experiment.

For the second one I went with a handle. I had to rethink the handle to make it proportionally big enough for this cup.

I'm continuing to play around with my new GR Potter Wallie forms. This is made with the 10 x 10 caserole form. The handles were made with a Diamond Core tools XL extruder. These are both ClayShareCon purchases. I bought less than last year, but still a lot of things to work through.
This dish was surprisingly simple to make. I rolled out a slab that was just slightly thicker than 1/4 inch. I put the form down, made relief cuts on the corners, and then flipped the whole thing over. I smoothed down the sides with a red rib, slip and scored the corners, and secured them. I extruded the handles and laid them on top so they would start drying together. After about 2 hours (I was doing other things) I flipped it over and took the form out. It was still pretty wet, but if I had left it on longer it could have cracked. I stamped my crabs and did minimal smoothing of the rim and attached the handles. The sides weren't dry enough to support it so I put underglaze bottles under them.
This picture was taken the next day when it had dried just enough to pull out the underglaze bottles and do some more clean up on the rim. Now for slooooow drying.

Just made a new batch of mushroom jewelry boxes. It's all simple skills that when they come together produce something new.

It starts with a slab and a circle the same way you would for a mug.

The sides have to come together and the bottom put on.

Looks like a mug. Now is when I'd start bellying it out if it was a mug. Since it's not I shape it, but don't add volume.

I neglected to take a picture of the larger circle that will be the top, but it needs a flange. I shape the flange on the flower pot to make it circular.

The top starts in something that is rounded to give it shape and then I add in the flange with a coil on the inside.

It gets shaped to being as circular as possible.

Then it gets flipped over and the worm gets added to the top.

8 pots on the shelf to be covered in plastic and dry for a couple of days. I want the pot to setup enough to carve the bottom and use the hole cutter.

I use a fluting diamong core tool to make the ridges on the bottom.

I use my fingers to flatten out the edge and make it a little wavy. Not required, but I like the look. I also give the worm little eyes just because.

Now we painstakingly do holes all the way around. The biggest challenge is to not go too close to the edge or too close to the previous hole.

Tada!! This is mostly done. Just some final clean up left.
Here are the luminaries from last week lit up. Also yes I clearly need to work on my night time photography skills.


